Deconstructing a Wedding: What Worked, What Didn't, and Where I'm Headed
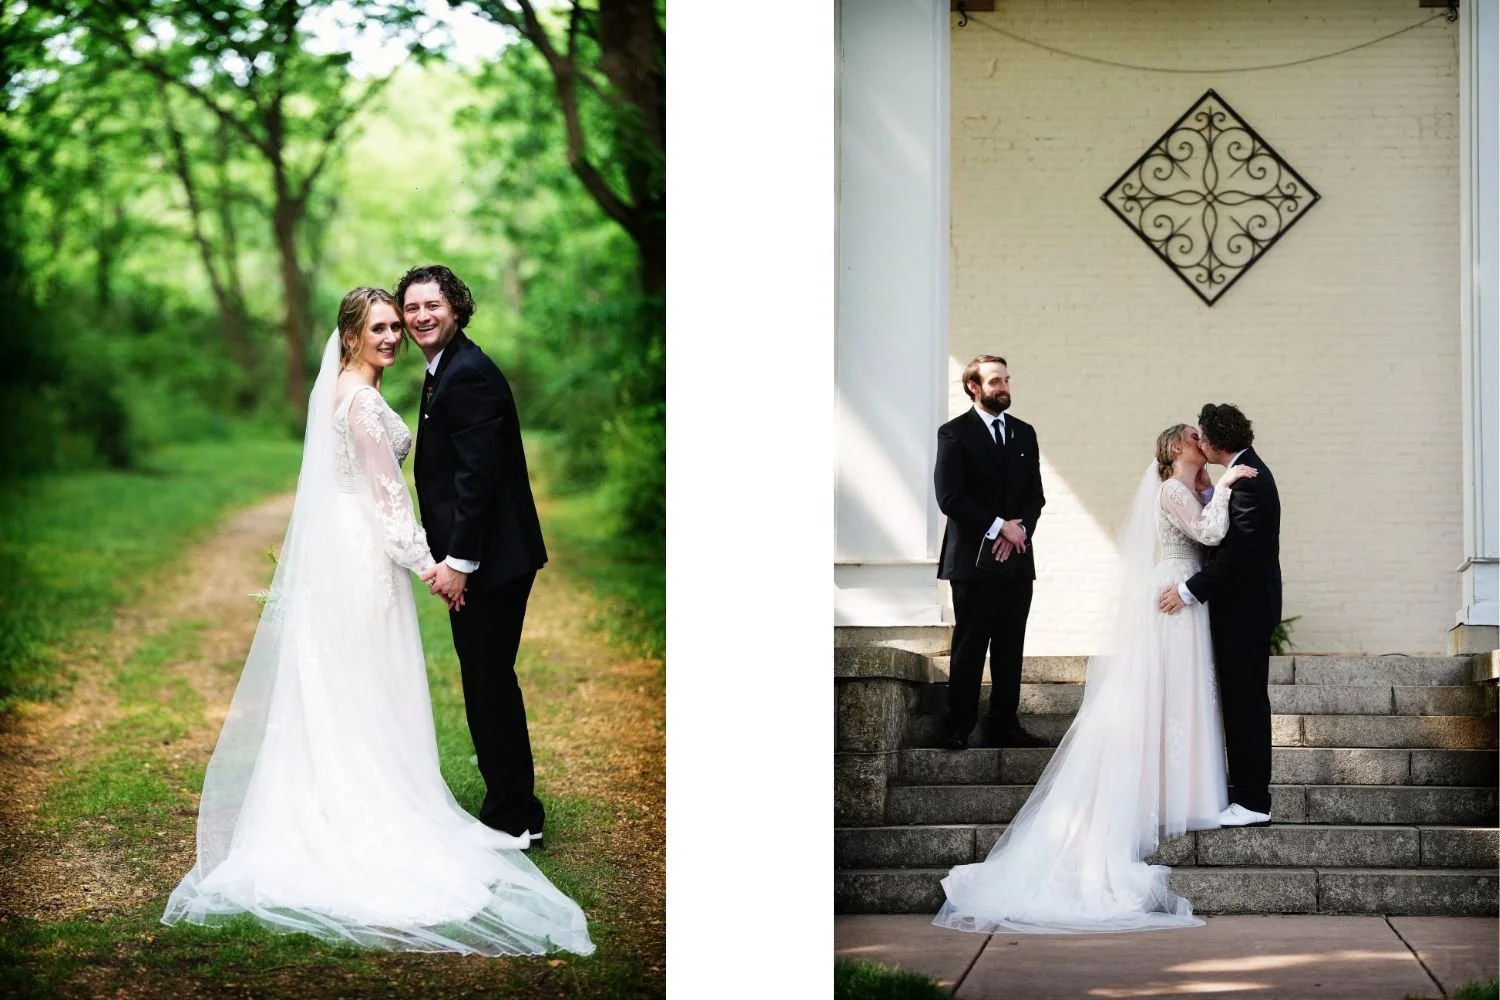

Every wedding teaches me something. Haley and Sam's this past weekend — held at the historic and charming Ludlow Mansion in Monroe, WI — was no exception. A thoroughly lovely couple, welcoming families, a warm late spring day, and wonderful emotion made for my perfect wedding environment.
The one and a half hour drive home turned into a full gear and workflow audit.
Here's my honest breakdown after that drive and subsequent ruminating on it on Sunday.
The Venue and the Rehearsal
Attending the rehearsal added about four hours to the weekend without direct compensation for this wedding, but the return on that investment is real: I get to know the couple and the key players, scout the location, and walk into wedding day with a mental map already drawn. The ease of coverage that comes from that familiarity is worth it every time. I’m not a shock to the system for people on an already hectic and stressful day (the wedding day), I’ve already handled that period of awkwardness that occurs when a photographer and cameras are thrown into the mix.
Ludlow Mansion was a pleasure to work in. It had genuine vibe and character — a far cry from the modern, hotel ballroom — and having the couple staying on-property made moving between bride and groom seamless.
Gear: The Honest Audit
What I Carried vs. What I Should Have Carried
I set out to pare the kit down to essentials. I did okay — but not well enough. By the drive home, my lower back was letting me know it.
The culprit is a familiar one: carrying my heaviest glass on one side for hours accumulates. The 28-70 f/2 and 50-150 f/2 are exceptional lenses, but they carry a cost beyond their price tag. Swapping to a full prime kit has crossed my mind more than once, but I know from experience that I'd miss the flexibility of those zooms within a single wedding. That's not the answer.
What is the answer: matching the right lens to the right part of the day.
I ran two bodies: the A1 and the A1 II. The A1 II had no battery grip on it . The A1, however, still had its grip on, and that's coming off going forward. Though the grip helps especially for verticals, the added weight just makes it a bit much at the end of a 8-12 hours day.
And the belt pouch system I've been using for carry? I happened to forgot it at this wedding and in hindsight, was glad I did. A full day on a belt works the lower back over for me. I'm going to try replacing it with a Think Tank Aircross Sling Bag 11L, which should distribute weight better and naturally keep the tool selection minimal. We shall see if that does the trick.
A Phase-by-Phase Breakdown
Prep
Problem: I had the 50-150 on my shoulder during prep — overkill for that part of the day and unnecessary fatigue.
Going forward: 24-50 f/2.8 G and 85mm f/1.8, with the 90mm macro within reach. Small strobe. Sling bag. That's it.
Ceremony
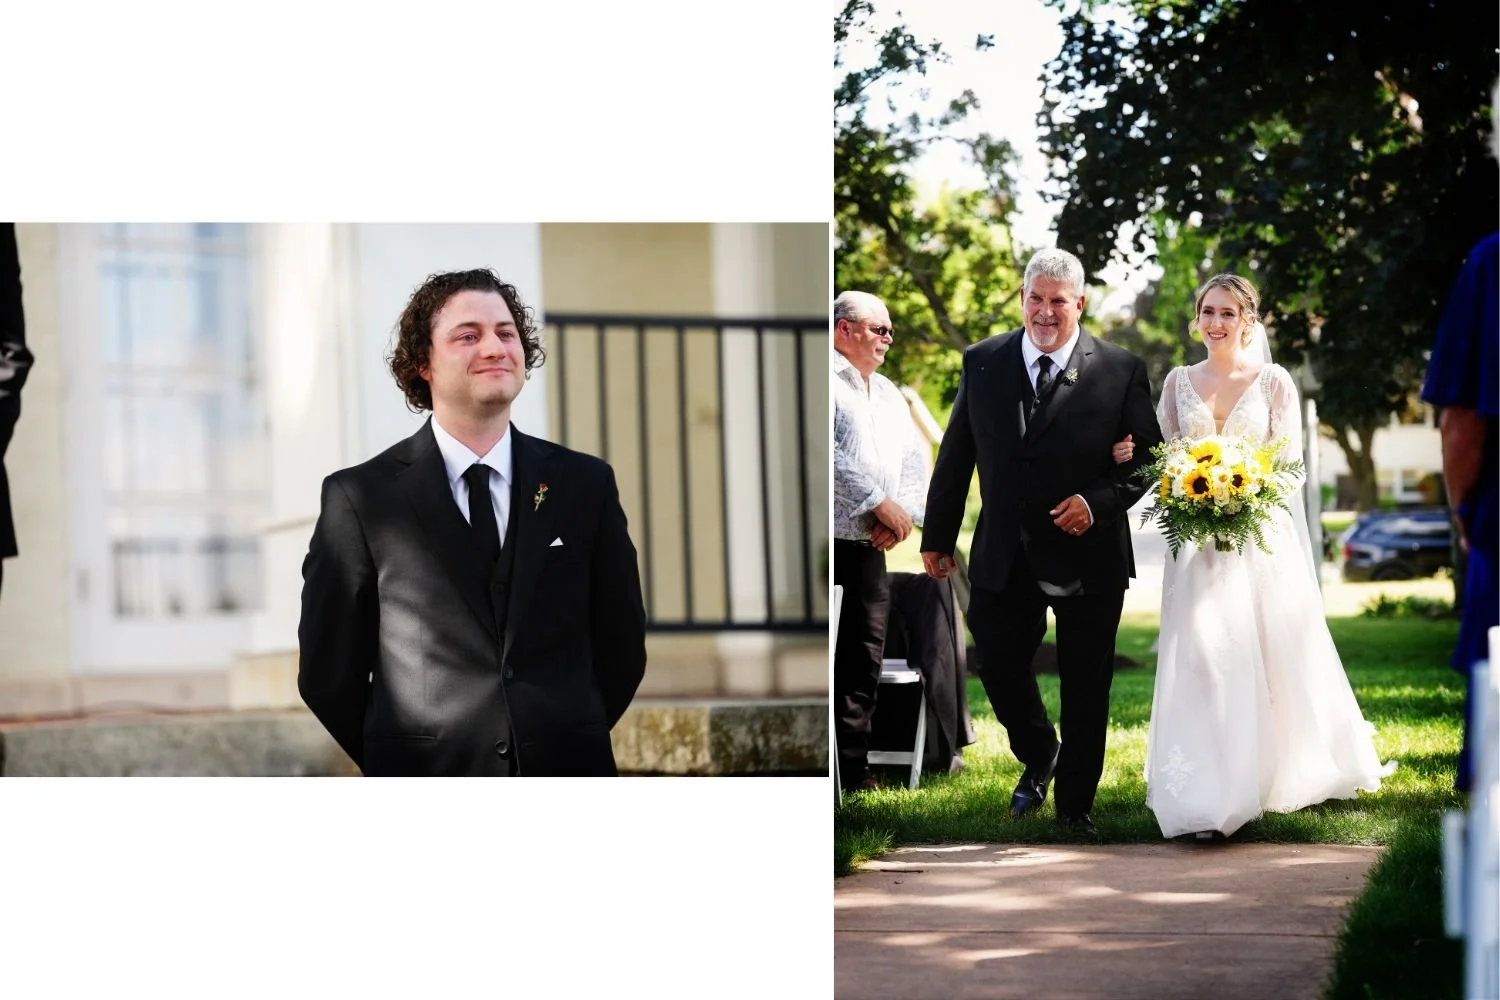
The ceremony itself was held outdoors on the steps of the mansion — no altar, no formal setup, just a simple and personal exchange officiated by one of the couple's closest friends (who ironically has his own wedding in nine days!). That intimacy of setting makes for some of the most genuine coverage; there's nothing artificial to work around and nothing between you and the moment.
The 16-35 and 50-150 combination was truly perfect here — wide enough to take in the steps, the oak tree and the rest of the surroundings, long enough for compressed, intimate coverage of the couple and their officiant. This pairing stays.
Going forward: Break these out specifically for ceremony and leave the sling bag behind during this phase.
Grand Entrance
The 16-35 did the work, but going slightly too wide was a risk.
Going forward: The 24-50 is a better fit — lighter, still covers 24mm, and reduces the chance of distortion at the edges. A flash in the hot shoe for bounce will continue to be used as it was on the day.
Table Dash
This is where the 16-35 earns its place beyond any doubt — and where the case against going all-prime becomes clearest. The table dash is inherently chaotic. Guests are animated, tables are packed, the angle of every shot is different. Being able to float anywhere from 16mm to 35mm in real time to find the optimum framing without moving your feet is exactly what a zoom gives you that primes simply can't. Sometimes the scene called for wider to take in the whole table; sometimes a tighter crop made a better image. A fixed focal length would have meant constantly compromising the framing.
Lighting here was a single speedlight in the hotshoe, bounced — not direct. That distinction matters. Bounced flash wraps the light, and fills shadows naturally. Direct flash is harsh and flat, and while it is currently in vogue, I believe the softer light from bounce flash tends to be more flattering. The bounce approach kept everything looking like available light with a little help.
Speeches
The 50-150 performed well for tight coverage of speakers.
Going forward: Adding a monopod (either the Sirui video or photo version) for this stretch. Eight hours in, hand-holding a long lens during extended speeches is a fatigue tax I don't need to keep paying.
Reception / Dancing
The 28-70 and 55mm f/1.8 did the job. That said, I'd love more low-light character in these shots — the kind you get from faster glass.
Going forward: A 35mm f/1.8 (Sony or the Viltrox 35 Evo) is on the radar as an affordable way to open things up in low light without a major investment. The 28-70 is pretty heavy, especially at this time in the evening, the 24-50 will be a better option going forward (when used with flash, especially)
Lighting
Strobes
The AD200 on a 9-foot stand was used specifically for the post-ceremony family portraits outside — exactly the right tool for that job. Plenty of power to balance against the late afternoon ambient. No modifier other than a reflector was needed; the goal was reach and punch to fill in the outdoor light. A small Cheetah umbrella/softbox stays in the bag for situations where diffusion makes more sense.
LED
The Zhiyun 60W RGB with fresnel and barn doors continues to be a reliable back lighting kicker for dancing. The Amaran Ace 25 Color is solid for handheld on-camera work, though the magnetic mount isn't as secure as I'd like and the balance isn't ideal.
The Harlowe 5W LED is a nice little tool — not sure it has enough output for the dance floor, but worth continuing to evaluate.
Going forward: I brought two V-mount batteries and used neither. One battery plus a small power brick for the Ace 25 as a second light source is probably the smarter load. The 8-foot Cheetah stand I brought and didn't use is also getting swapped out for a lighter Ulanzi 6.5-foot selfie-style stand dedicated to the Ace — more practical, less weight.
Photo Only: A Different Kind of Freedom
One thing worth naming: this was a photo-only event. No video, no multiple camera setups, no tripods, no audio — and I noticed it. There's a clarity to covering a wedding when your only job is to make great still images. No worrying about whether a taped lav microphone stays in place during the vows, no managing extra camera bodies for “coverage”, no audio worries or sync headaches in post. Just you, the moment, and the frame.
I genuinely enjoy the full wedding film process, but days like this are a good reminder of how much mental overhead the video and audio side adds. Something to keep in mind as I think about how I structure offerings going forward.
The Bigger Picture
The work itself was strong. The couple was happy. I was pleased.
I'm also at a point in my career where the physical sustainability of how I work matters just as much as the creative output. A back that holds up across a full season is as important as any piece of glass I carry.
The goal isn't just to carry less — it's to carry smarter. The right tool at the right phase of the day, distributed better, with less redundancy. That's the direction.
Always evolving.
Annika + Alex’s Madison wedding! A great start to this summer’s Wedding Season
Last Saturday, Annika and Alex were married at Quivey’s Grove just outside of Madison. It was a perfect spring day and it was just an excellent way to kick off the wedding season. The women got ready for the wedding at the Fluno Center on the UW Campus and the boys got ready at a nearby hotel. The first look was at the Terrace which was a place that held special meaning for Alex and Annika.
Guests came from all over the country to support the couple and the group was a mix of all ages and everyone made me and Jeremy feel like a part of the family. And these people were dancers! Made our jobs fun and exciting because there was no down time at all.
This is a sneak peek from the day as we did both photos and video. Jeremy handled most of the video, I did a little bit additionally, and then I did the edit.
These two UW-Madison graduates were surround by nearly 200 of their closest families and friends and danced the night away under the tent at Quivey’s with a full moon rising.
Congratulations to this lovely couple and wishing them a great future together!
A Tribute to Rob Schumacher
A remembrance from a friend and colleague
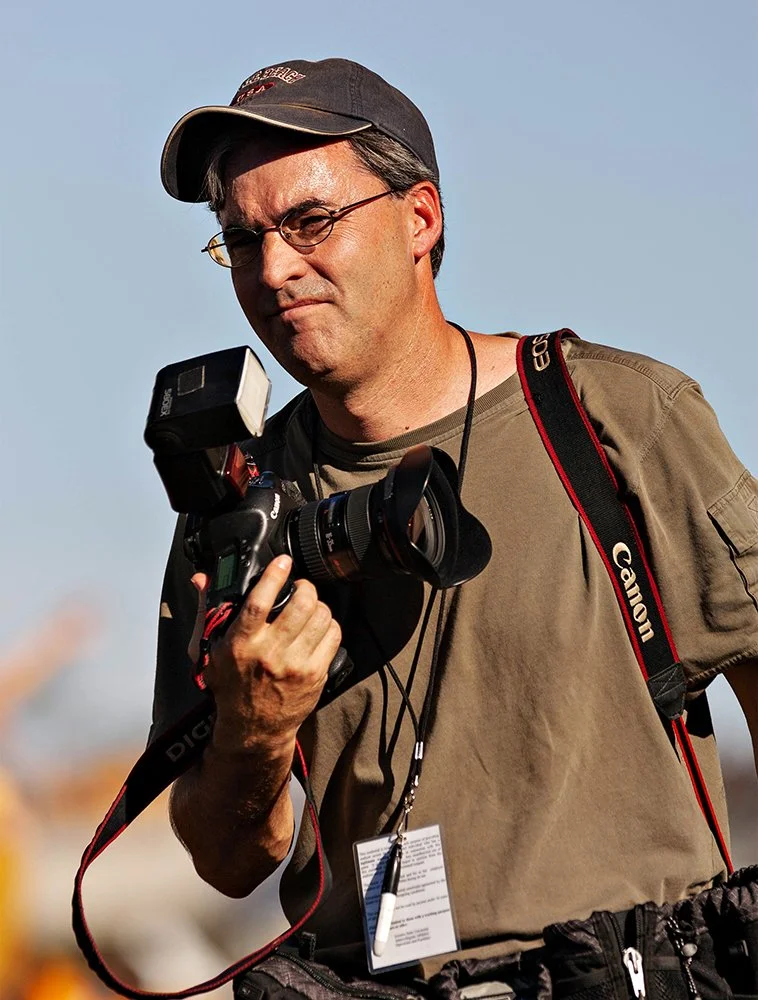
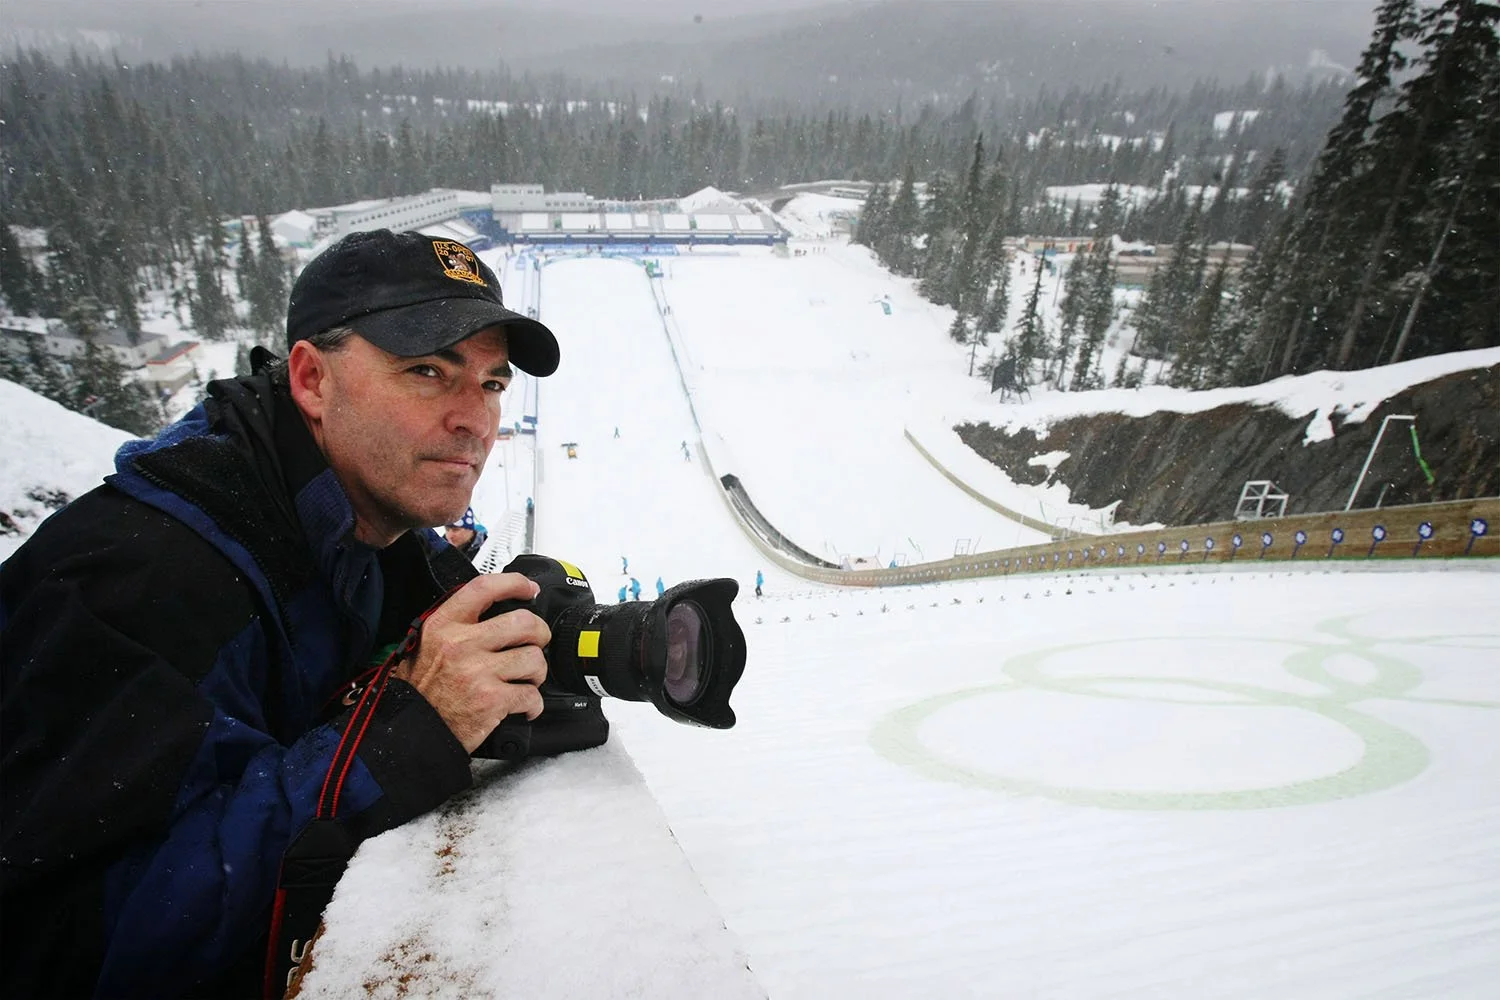
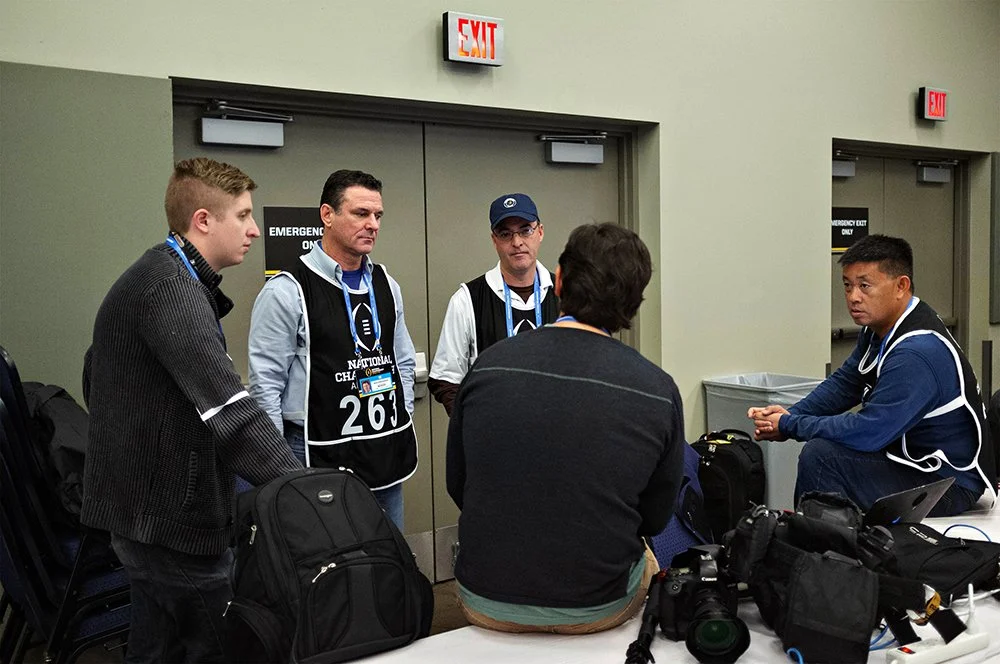
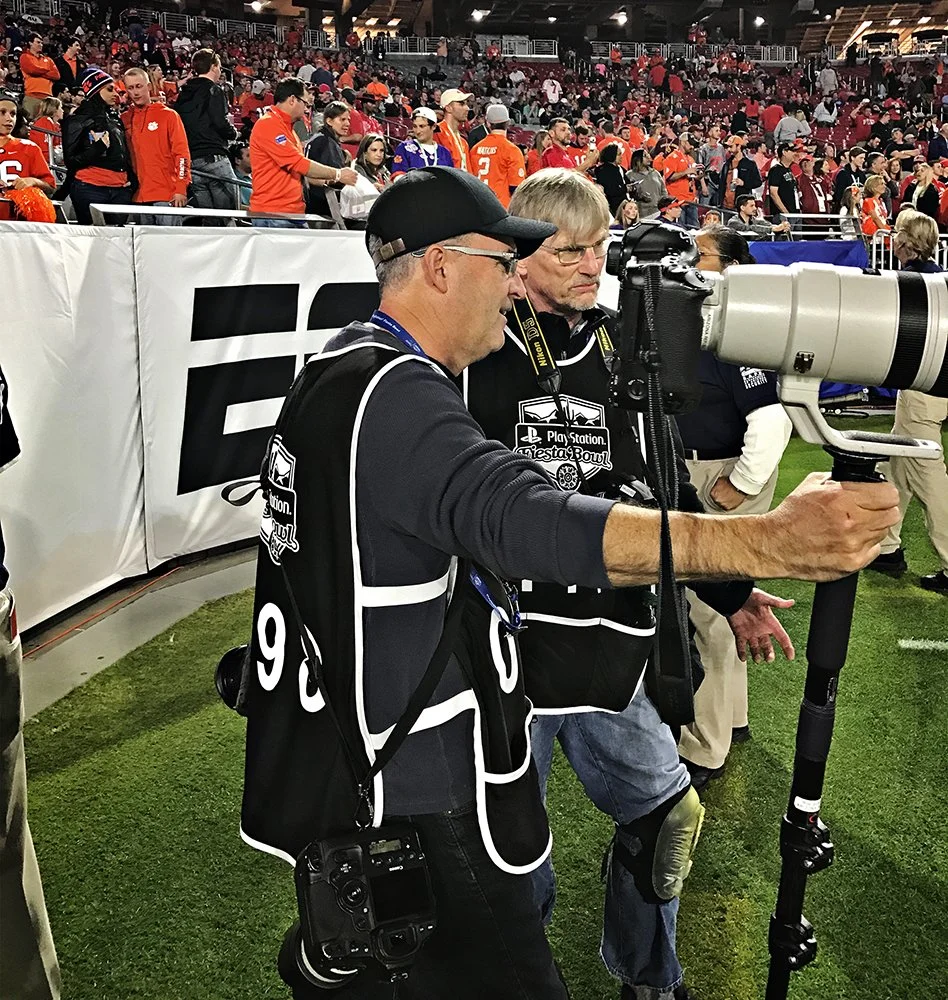
Rob Schumacher on assignment for the Arizona Republic in 2007. This photograph and the other photographs (below) courtesy of Tom Story.
The late-night email from a former colleague was ominous — one you never want to receive.
Rob Schumacher was gone.
Rob and I were colleagues at the Arizona Republic for nearly twelve years. The words that come to mind first are quietly fierce — as a photographer, as a competitor, as a friend. He was a meticulous planner and student of every sport he covered, and he lived to make not a good frame, not a pretty good frame — the best frame.
We met briefly during the 1988 campaigns when Jesse Jackson's campaign came through Tempe. Rob was the Phoenix AP's number one stringer, and he wanted to be wherever the big story was — sports, news, whatever. He was hungry for all of it. And despite that drive, he went above and beyond helping me get my photographs back to my paper in Chicago, staying longer than he should have to help a stranger out.
When I interviewed at the Republic two years later, Rob had taken a job in the Scitex department — the film era's scanning operation. But the air-conditioned darkroom wasn't where his heart was; it was merely a foot in the door. He wanted to get back on the street.
Rob got out of that digital cave and back onto the street, and his drive, talent, and passion propelled him to better and better assignments because he delivered. Always.
The year Charles Barkley came to Phoenix — 1992 — Rob and I spent countless hours together: meals in the media room, games on the road, him on one end of the court and me on the other, both of us quietly competing for access to the strobe units mounted in the rafters. Whether he was shooting with the strobes or with the available light, Rob was dangerous. It took my very best to make a better image than he did, because he seemed to always be on.
One image of his from the 1993 playoffs stays with me. Dan Majerle hit a record eight three-pointers against the Seattle SuperSonics, and Rob had the presence of mind to shoot it horizontally — unusual for basketball, a vertical sport — capturing the shot, the players, and the scoreboard in a single frame. It ran six columns across the top of the sports section. That wire-service training of his taught him to pack as many storytelling elements into one image as possible. He nailed it, as he so often did during that run, making all of us — Rob, John Samora, and me — look good.
That Suns run to the 1993 Finals was the best stretch of my nearly twenty years in daily journalism, and a large part of what made it special was sharing it with Rob.
He was the one who called me in January 1997 to tell me our merged papers were shuttering the afternoon Phoenix Gazette.
That tumultuous week — dozens of careers in the balance, management handling it with a shocking lack of empathy — we spent hours talking through the fallout, and afterwards instinctively looked out for each other against the new regime.
Through every upheaval — the closure, the paper’s eventual sale to Gannett — Rob kept climbing. He covered the Olympics. His Masters coverage became legendary. He was such a fixture at Augusta that I cannot think of that tournament without thinking of him, which made perfect sense, because Rob was a great golfer who loved the game deeply.
I will never forget the day Rob and Sheila brought their newborn Sara into the office. She was one of the most beautiful infants — no surprise, since Sheila and Rob were a stunning pair. He was completely at ease with that little baby in his arms. He was ten years ahead of me as a father, and I believe it was his favorite role. They would add a second daughter, Rachel, a few years later.
After Nicki and I married in 2001, I soon left journalism and Arizona behind in early 2002. Rob stayed to fight the good fight. We'd talk about once a year — family, the state of the Republic, what he was hoping for next.
He came to visit us in Ladera Ranch, bringing Rachel, then about eight, and she kept an eye on our firstborn Kate while the two dads laughed about the same old characters from work and talked about the days when newspapers were kind of a big deal.
The last time I spoke with Rob was earlier this year. Two former colleagues had taken buyouts and I called to ask if he was doing the same. He said he hadn't — he was planning to retire in a couple of years.
I thought he sounded tired and frustrated, perhaps a bit betrayed by a newspaper that had once held him in such high regard and now seemed indifferent. Maybe that's what happens when you stay anywhere long enough, apathy setting in on both sides.
But for someone who had given as much as Rob had — emotionally and physically — it must have cut deep.
My heart breaks for Sheila and the girls and his entire family.
I will be forever grateful for having Rob on my team, and for our friendship during those years when we were both trying to find our place in a competitive industry — competing fiercely and watching out for each other at the same time. I will miss his stoic, quiet resolve. And I am sad that distance came between us after we left Arizona.
Thank you, Rob, for the years you pushed me to be a better photographer — and for showing me, by example, that being a husband and a father is the assignment that matters most.

What Does the Sony a7RVI Mean for Photographers and Filmmakers?
The Sony a7RVI is an impressive camera just released by Sony that is an update from an already impressive camera.
But is this the right camera for me? For you? What things does this camera’s launch perhaps telegraph about future Sony offerings.
In this post I look at why this may or may not be the next camera for photographers and filmmakers such as me who do a variety of genres including weddings, portraits, sports and commercial photography and filmmaking.
For me, the camera while impressive, is not for me. BUT what it gives me hope for in future offerings is my greatest takeaway.
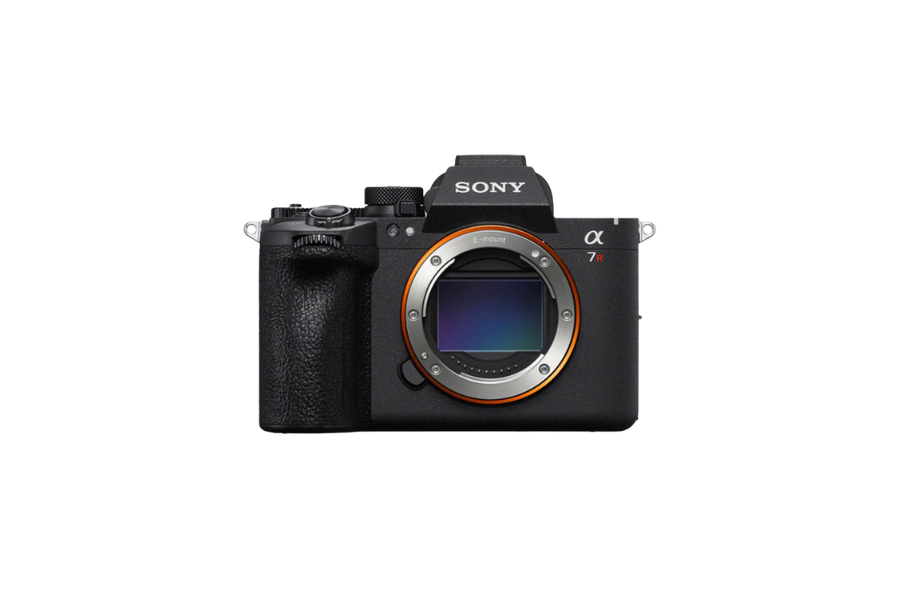
Sony’s new high resolution camera, the a7RVI, was announced today in NYC.
What Does the Sony a7RVI Mean for Photographers and Filmmakers?
Today Sony launched their new high-resolution flagship, the Sony a7RVI. At an event held in New York City, the camera was unveiled to photographers and the media for the first time.
(They also launched a new 100-400 f4.5 G Master lens which is something I am VERY interested in and will do another post on that shortly).
As a wedding and portrait photographer who also shoots sports, commercial work, and a fair amount of video, the question I keep coming back to is: is this the right camera for me?
Your needs may vary — I get that. But here are some thoughts I've worked through based on the specs, and from conversations with people who were on the ground in NYC for the launch.
To cut to the chase: will I be buying one? While I never say never, there's probably a 99% chance the answer is no.
Why I'm Passing — For Now
The a7RVI requires a new battery and a new grip, which adds cost on top of an already substantial price tag. I'm not pretending this is a permanent stance — any Sony camera moving forward will almost certainly require these new components, so it's more a matter of timing than anything else. For now, I'm content to stay in the Z-battery ecosystem. Much like when Sony transitioned from the older W batteries to the Z battery back around 2017, this is simply the direction things are heading.
The 67-megapixel file size is genuinely impressive — for the right shooter. For me, it's overkill. This is coming at a moment when both traditional hard drives and SSDs have jumped significantly in price, particularly since late last year. That means added storage costs on top of the camera's already considerable price of entry.
I already shoot a staggering number of frames — upwards of 5,000 JPEGs (not RAW — I shudder to think what RAW files would look like) at my son's baseball games alone, using an a1 and an a7V. Adding a camera that dramatically increases file sizes just doesn't make practical sense for how I work.
The cropping capability of the a1 is no slouch at 50 megapixels, and while the a7RVI's expanded dynamic range and larger pixel count would certainly help in that department, for my specific needs it represents a marginal gain — not a leap.
The AI autofocus continues to improve, as you'd expect, and that's genuinely exciting. But even when shooting sports, I find myself in a really solid place with the AF performance of the a1. Is the a7RVI's focus system better? Yes. Would it be nice to have that fancy screen on the a1? Yes. Is the difference meaningful enough for what I do day-to-day and in the foreseeable future? Honestly, not really. Again — marginal gain.
The sensor improvements are legitimately impressive. Sixteen stops of dynamic range and 8K at 30fps for video are jaw-dropping numbers. I just don't need them right now.
What This Launch Signals About Sony's Future
Here's where things get genuinely interesting — because what the a7RVI tells us about upcoming Sony cameras may matter more than the camera itself.
The Sony a1 III
The a1 remains a dream camera for sports photographers — particularly for sports involving bats, clubs, and balls — because its fully stacked sensor produces almost zero rolling shutter distortion. My 2020 a1 handles 30fps beautifully in those situations. The a7V, for all its new features and improved tilting screen, still struggles with distortion due to its shutter. From what I understand, the a7RVI shares that limitation — and honestly, that makes sense. If Sony gave this body a sensor with a fast enough readout to eliminate that problem, they'd essentially be cannibalizing their own flagship line. Something has to justify the significantly higher cost of the a1 and a1 II.
It's also likely why the a1 and a1 II sit at 50 megapixels rather than the 61 or 67 of the high-resolution bodies — pushing that kind of resolution on a fully stacked sensor at those speeds is a different engineering challenge altogether.
Will the a1 III feature a larger file size given these sensor advances? I genuinely don't know. It's possible. But it's not something I'm losing sleep over — 50 megapixels works extremely well for what I do.
What I do expect from the a1 III: all the AI upgrades we're seeing here, improved dynamic range, enhanced speed, and the new battery system. Whether it pushes beyond 30fps, I'm not sure — though perhaps Sony takes a page from the a9III playbook and adds a high-speed burst mode. A modest resolution bump, maybe to around 55 megapixels, seems plausible. But even that would be one of those quality-of-life improvements that adds more to your storage bill than to your images.
Given the timing — with the Olympics and World Cup Soccer on the horizon — I'd expect (and just guessing) that the a1 III to arrive sooner rather than later.
The FX3 II (or Whatever They Call It)
The a7RVI also has me thinking about the future of the FX3 line. The obvious upgrades would include the improved articulating screen we see on the a7RVI, the new battery system, and 32-bit float audio support.
I suspect the 12-megapixel sensor era of the a7SIII/FX3 generation may be coming to a close. A move to a larger sensor — say 24 or 30 megapixels — that downsamples from 8K to 6K or 4K seems likely, and the improvements Sony has demonstrated with higher-resolution sensors suggest noise performance could remain on par with the previous generation even at those larger file sizes.
My wish list for that camera would include: open gate recording, some form of compressed RAW in-camera, and three base ISOs instead of two — giving clean options at 800, 3200, and 12800.
The Bigger Picture
None of this is meant to rain on Sony's parade.
The a7RVI is a remarkable piece of engineering, and it signals that Sony's sensor and AI technology are advancing at a healthy pace. The quietly released XLR-A4 audio interface is also worth noting — 32-bit float audio capture is a genuine boon for event videographers who can't always control audio levels the way you might on a commercial or scripted project. And the fact that it works with existing cameras is a nice bonus.
The truth is, all the major manufacturers are making exceptional tools right now. Whatever system you shoot on, if you know what you're doing, you can produce great images and competent video.
The cameras just still don't point themselves at the subject — and they still don't know when to press the button.
Thankfully, that part hasn't changed.
Evolving a Working Wedding Videography System — insights after Video Wedding #1 this year.
On Saturday I had my first video wedding shoot (technically it was shooting for the venue but still worked it much like I would if I was shooting for the couple with some exceptions).
And, after the event, I gained quite a few insights that I want to share.
Ultimately, the goal is to find a working system of tools and methods for covering a wedding as a videographer/filmmaker. I want to make my wedding videography coverage as instinctive and as seamless as it is to do wedding photography (something I have done for a long time).
I’m trying to find what is the right fit for me and perhaps you will be able to use something from this post.
What worked:
The Sony a7sIII with the 28-70f2 was an absolute dream.
The little Amaran 25C Ace is a champ. I will add a second and will then have a very small lighting package going forward. I will add the grid and pouch on this next one ordered as well as purchase the grid for the one that I already have.
Using tripods throughout the day worked really well. I much prefer this to working with a monopod as I always feel like the monopod is going to get toppled and I never feel like I can get it truly locked off and totally motionless.
My old small Manfrotto 6 1/2 feet collapsible light stands — will throw one more in the kit.
The Zhiyun small quick release for an extension arm (a selfie stick … er, more on THAT later) as well as mounting small lights.
Using the Sony a1 as “the gimbal camera” and kept it on the Ronin RS4 Mini all day. When I needed a gimbal, it was always ready and quickly accessible. When I had a long take such as speeches, ceremony, I could either leave it on the floor using the small tripod feet (which I did since I didn’t have a third tripod) or leave it on a tripod attached with the Falcam F38. BTW if you hate gimbals, the Ronin RS4 Mini will absolutely change your mind.
Using the Falcam F38 shoulder strap clip to hold the Ronin worked superbly and means I don’t have to bring the dedicated Small Rig Strap (just another thing) to carry the gimbal.
Having two Peak Design straps (one Slide Lite and one Leash) worn bandalero style across my body are rather subdued, and a quick way to hold cameras, lenses, and even a camera on a gimbal. Plus they are very quick to change when you want to reconfigure for eye level viewing or shooting with the rear monitor. I have tried numerous straps including the Holdfast Moneymaker (very good but I felt like I couldn’t change off of the strap quickly enough) or the Spyder belt (felt like I was always going to drop a camera from my hand when using these). I needed a system that allows me to go from camera strap, to tripod, to monopod, to gimbal with a literal snap. The F38 Falcam system does just that.
What did not work :
The two small Sirui travel tripods were just a little too small. I didn’t want to leave any gear on them without being in sight for fear that they might get bumped and topple. With the a7sIII and the 28-70 f2 it puts a bit more weight on them but the fx30 and Tamron 17-70 is pretty light, though I wish it had a tripod collar as the lens makes it a bit front heavy. I am going to try a new tripod and I will see if it’s going to be “the one” going forward. Also, the video head on the tripods (a Sirui VA5 is very good but heavy and the Neewer leveling plate is also heavy making the unit bigger still and even MORE top-heavy. The new tripods coming in this week *should* eliminate this problem. We shall see. The key thing is that they have to be shorter than 20”, and less “faffing” around with adjustments as was the case using the leveling plate and the pan/tilt head.
The older Versa-flex sling bag got heavy on my walk from the venue back to the car. Even though it had a relatively light payload. I thought maybe a smaller type of sling bag to carry would be the answer, but after the walk back I know that is NOT the answer. What is the answer? Having things fit into a small Pelican roller case so it means things have to be less than 20” long to make it work. That way it will be one backpack with cameras, lenses and gear and one Pelican roller to get all the gear to the event. I don’t want a cart, I don’t want three huge “video” tripods and I don’t want to be using the aputure 60x this year.
My 24 bit audio recorder (Tascam 40x). I mean it worked, but it is a PITA to use. I have had it for years and I NEVER liked it. I find the menus still very confusing — I need to get either the new Tascam 32 bit float recorder (DR-AV2), or a Zoom F3 which is Gero proof.
A selfie stick for an extension arm on the nightstands. The good side of the Manfrotto travel stands is they work well and are small to pack, but they’re short (6 1/2 feet). I tried using a self stick as an extension arm and while it works okay, I still feel the light attached is still pushing the weight limits. Those selfie sticks are really meant for iPhones, and GoPros. So what I did a couple days earlier (and what arrived after I got home) was order an extension arm that looks like a real tripod. It’s aluminum and gives another two feet. While the Manfrotto is still not meant for really heavy lights, I think I will even be able to hold a Godox ad200 and maybe a small umbrella (probably not a big heavy soft box, though). But it will still allow me to keep the gear requirements down. This is the one, that I got. Once I saw it, I immediately ordered a second I felt like it was the perfect arm for what I need:
I need to add some fluroescent gaffers tape. While working at a really dark venue such as the Orpheum I noticed how they were using this type of tape to help make things more clear. While I had yellow gaffers on my tripods and my light stand, I still don’t think they were bright enough. And, if I need to tape the legs of the lightstand to the floor, I want to make sure that the tape is seen.
Not having a full frame lens for the Sony a1 gimbal camera. I used a 11mm f1.8 Sony E mount lens and it is good, but it means I can only use it in aps-c mode on the a1 and really can’t use it on the fx3 or a7sIII because in video mode they don’t really do aps-c (they you could use Clear Image zoom on those, but then you lose eye AF in video). The answer is something in the wide angle range — a full frame 16 1.8 is probably the best and most cost effective strategy. It’s about $798 new and can be used on Full Frame and aps-c cameras (it will crop in to approximate a 24mm focal length on APS-C). While I have thought about a 16-35 f2.8 (I used to own the GM and sold it and GMII is great and light but more than I want to spend for a lens that I don’t use a lot. I also considered the 16-25 f2.8 G but I have heard some reports of barrel distortion. The size is good and the price is good. The fast 16mm prime, however, makes the most sense as it is a focal length that I rarely use unless it is to shoot interiors, a Timelapse or a reveal with a gimbal. Plus the aps-c cropped 24mm would be helpful and useful too on the FX30 or the aps-c mode of the a1.
As nice as it was to limit myself to primarily shooting with the 28-70 and 17-17 (on the fx30, the equivalent of a 25-105), I still found myself wishing for just a bit more reach. My 70-200 was left at home and the same with the 135 — they are both great, but they add a lot of weight and take up space in a bag when trying to keep things small. Still, I think the lens that would be a perfect compliment to that 28-70 would be the 50-150 f2. Having the zoom range would be helpful. I know there’s always give and take in the photo and video world about folks using prime (fixed focal length lenses) or zooms. As the zooms have gotten spectacularly good and fast aperture, the reasons for me wanting to use primes become negated. In fact, with the exception of the 135 1.8 GM, I have no GM primes anymore. And the 135 would be sold to make room for the 50-150. Yes, I believe it’s that good and losing the 1/3 of a stop is negligible given the compositional advantages in fast moving situations.
I have to figure out a lighter solution for audio cables — they take up far too much space and weight.
On camera audio needs to get standardized. I have a ECM-B10 Sony shot gun mike and it is good and small and works simply. I also have an XLR-K3M and while it works well, it is big and draws attention. On the other camera I used a small Rode Micro. The problem with the Rode is that you have to constantly be keeping an eye on the audio, unlike the Sony which I use in auto mode. On the gimbal a1, I had no audio just taking in scratch audio from the camera’s on board. Like the Rode Micro, you have to keep an eye on audio levels especially during a musical performance.
Plan going forward:
Get 16mm f1.8 G prime lens
Get 50-150 f2 GM zoom lens (sell 135 1.8, and 70-200 f2.8 GM)
Get another Amaran Ace 25C light
Get a 32 bit float recorder (preferably one that also does timecode for future use: leaning towards the Tascam DR-AV2 or even the Zoom H1 XLR (I know many reviewers do NOT like it, but it may work just fine and is priced well (about $150).
Add 3 tripods that are quick to deploy, sturdy and will fit within a 20” case (ORDERED and TBD)
Add another extension arm to use on the 6 1/2 travel stands. (DONE)
Add a tripod collar to the Tamron 17-70 (found one! It’s the same one that I used on the 135 1.8 GM so I already had it!)
Check out the Sony ECM-M1 and the ECM-G1. The M1 is about $300 while the G1 is half the price. The M1 is probably their best little shotgun, but I would rather test and see if the G1 will do the job. I could get two for the price of one and they could become the audio gathering standard for the cameras. The other option is to not use any microphones to keep a really low (non-videographer) form factor and use some furry wind screens over the camera mikes. That’s the one thing I noticed when outside and shooting video on the gimbal a1 is that I heard wind noise. My hunch is that the G1 will be the hot set up and then I would get one for each of the cameras.